HUZZAH ESP8266 Feather / NeoPixel FeatherWing / HTTP Webserver / HTTPS API Requests / JSON Requests and Responses

There is a lot going on the the title of this post and there has been a lot of talk lately about the Internet of Things. I have always had a fascination with electronics and while growing up took every chance I could to disassemble something to see how it functions.
Over the last few years I have been doing full stack development in Javascript and recently had some encounters with Java and Groovy and thought it would be fun to experiment with some IoT hardware and get familiar with some C++ syntax.
This project is going to be a build notifier for displaying fancy red or green LEDs based on the status of our Teamcity builds. This is very much a work in progress so these are the first stages of the project and are here to demonstrate functionality .
To start off I've broken the default jumpered pin on the Neopixel Featherwing and dropped some solder onto the featherwing jumper that lines up with pin 15 on the HUZZAH ESP8266. This means that the ESP8266 will communicate with the featherwing with only pin 15 and the common ground they share. However the featherwing will need power from the USB or battery and all of these connections will be made after soldering the featherwing onto the ESP8266.
These 4 pins on the HUZZAH board are in use:
- BAT
- USB
- GND
- pin 15


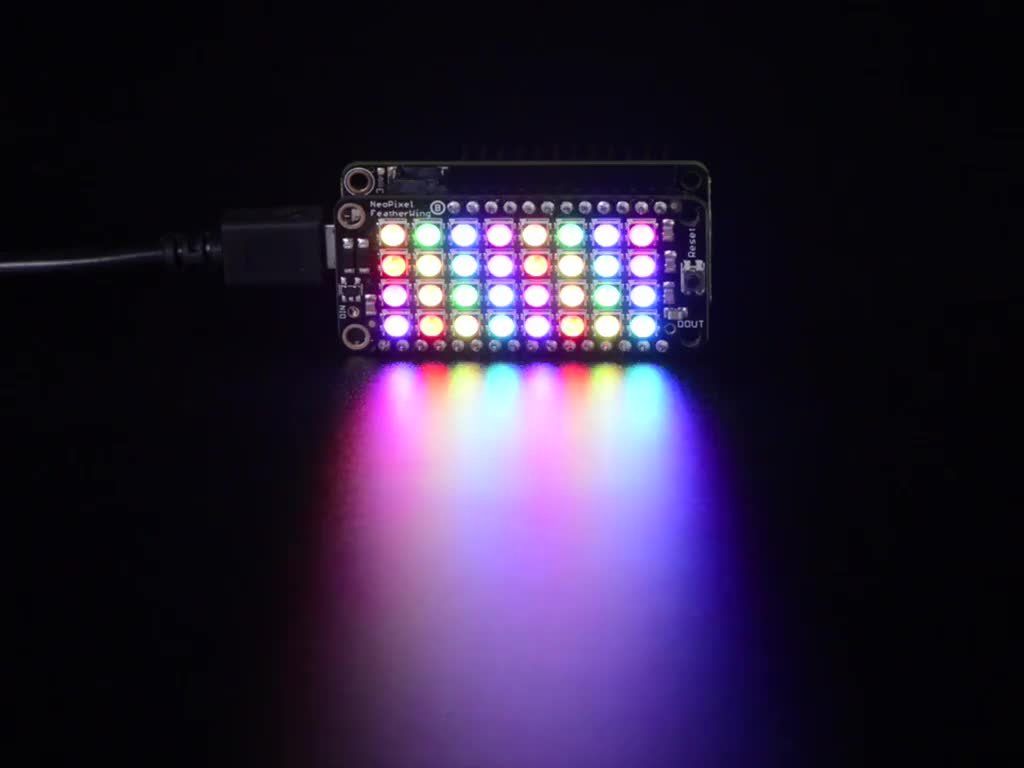
Now that wasn't too hard. We now have a nifty looking array of RGB LEDs to work with! On to the software!
Here I'm going to touch on some of the main parts of the software however the entire repository is available on my github.
Web Server
Built based on this example from Arduino using the ESP8266WebServer library.
I really like the ESP8266WebServer library because it allows you to execute a function based on the URL path. In my case I want to deliver a ReactJS web app when someone browses to the root path of our web server and also have other paths for executing specific tasks/functions like turning LEDs on/off.
Import libraries
#include <ESP8266WiFi.h>
#include <WiFiClient.h>
#include <ESP8266WebServer.h>
#include <ESP8266mDNS.h>
#include "mainPage.h"
Initialize the wireless
#ifndef STASSID
#define STASSID "your-ssid"
#define STAPSK  "your-password"
#endif

const char *ssid = STASSID;
const char *password = STAPSK;
Initialize the Web Server and listen on port 80
ESP8266WebServer server(80);
Here is a barebones setup and loop functions to get the web server going. (See the repo for full code)
void handleRoot() { server.send(200, "text/html", String(MAIN_page)); }

void setup(void) {
  server.on("/", handleRoot);
  server.begin();
  Serial.println("HTTP server started");
}

void loop() {
  server.handleClient();
  MDNS.update();
}
Calling a REST API
Making a HTTP API calls is something pretty commonplace with IoT and the internet in general these days seems to be moving towards the use of APIs. Here I am calling the Teamcity REST API to get the latest build status based on the buildId passed to the function. I feel the important take-aways here revolve around calling an endpoint using HTTPS and providing the SHA1 fingerprint of the SSL certificate of the endpoint being called. Let's get into the code.
Include the ESP8266HTTPClient library
#include <ESP8266HTTPClient.h>Here is the checkBuildStatus function:
String checkTeamcityBuildStatus(String teamcityHost, String buildId) {
  HTTPClient https;
  String teamcityUrl = "https://" + teamcityHost +
                       "/app/rest/builds?locator=buildType:(id:" + buildId +
                       "),count:1&fields=count,build(number,status,statusText,"
                       "agent,lastChange,tags,pinned)";
  String fingerprint =
      "CA 06 F5 6B 25 8B 7A 0D 4F 2B 05 47 09 39 47 86 51 15 19 84";
  https.begin(teamcityUrl, fingerprint);
  https.addHeader("Accept", "application/json");
  https.addHeader("Authorization", "Basic BASE64_YOUR_TEAMCITY_USERNAME:PASSWORD");
  int httpCode = https.GET();
  String payload = https.getString();

  if (httpCode == 200) {
    // Parsing
    const size_t capacity = JSON_ARRAY_SIZE(1) + JSON_OBJECT_SIZE(1) +
                            JSON_OBJECT_SIZE(2) + JSON_OBJECT_SIZE(5) +
                            JSON_OBJECT_SIZE(6) + 290;
    DynamicJsonBuffer jsonBuffer(capacity);

    https.end();
    JsonObject &teamcityResponse = jsonBuffer.parseObject(payload);

    const char *buildStatus = teamcityResponse["build"][0]["status"];

    return buildStatus;
  } else {
    https.end();
    Serial.println("Failed to GET build status");
    return "Error occurred while fetching TeamCity build status";
  }
}
First we pass the full URL/path of the endpoint and the SHA1 fingerprint of the certificate protecting the endpoint to the begin method.
String teamcityUrl = "https://" + teamcityHost +
                       "/app/rest/builds?locator=buildType:(id:" + buildId +
                       "),count:1&fields=count,build(number,status,statusText,"
                       "agent,lastChange,tags,pinned)";
  String fingerprint =
      "CA 06 F5 6B 25 8B 7A 0D 4F 2B 05 47 09 39 47 86 51 15 19 84";
  https.begin(teamcityUrl, fingerprint);
Here we will base64 encode the Teamcity username and password to include in the header when we make the request. Create a Base64 encoding of a string concatenation of your username, a semicolon, and your password. Here are some examples from a command line.
$ echo admin:mysecurepassword | openssl base64 -e
YWRtaW46bXlzZWN1cmVwYXNzd29yZAo=
$ echo YWRtaW46bXlzZWN1cmVwYXNzd29yZAo= | openssl base64 -d
admin:mysecurepassword

$ echo admin:mysecurepassword | base64
YWRtaW46bXlzZWN1cmVwYXNzd29yZAo=
$ echo YWRtaW46bXlzZWN1cmVwYXNzd29yZAo= | base64 -d
admin:mysecurepassword

$ echo admin:mysecurepassword | python -m base64
YWRtaW46bXlzZWN1cmVwYXNzd29yZAo=
$ echo YWRtaW46bXlzZWN1cmVwYXNzd29yZAo= | python -m base64 -d
admin:mysecurepassword
We add some headers for authorization and to tell Teamcity we want a response in JSON format.
https.addHeader("Accept", "application/json");
https.addHeader("Authorization", "Basic BASE64_YOUR_TEAMCITY_USERNAME:PASSWORD");
Release resources
https.end();Next we execute the GET call and store the response as a string in the payload variable.
int httpCode = https.GET();
String payload = https.getString();
Next comes deserializing the response from Teamcity and that begins with setting up a JSON buffer and parsing the payload into the buffer for us to use.
const size_t capacity = JSON_ARRAY_SIZE(1) + JSON_OBJECT_SIZE(1) +
                            JSON_OBJECT_SIZE(2) + JSON_OBJECT_SIZE(5) +
                            JSON_OBJECT_SIZE(6) + 290;
DynamicJsonBuffer jsonBuffer(capacity);
Parse the payload variable into the buffer for use
JsonObject &teamcityResponse = jsonBuffer.parseObject(payload);Finally, in my case I only care about the latest status of the latest build so I am manually specifying to only take the first element of the build array and return the value of the status key.
const char *buildStatus = teamcityResponse["build"][0]["status"];

return buildStatus;
React UI
Getting the UI up and going was especially fun for me. React is a really versatile and powerful way to work with client side data and I was able to squeeze in React 16.7, LoDash, Fetch, and Ant Design for styling and have transpiling available via Babel so we can use next gen javascript. All of this in a single HTML page using CDNs. I'm storing the HTML as a string in its own file for ease of editing.
const char *MAIN_page = R"=====(
<!DOCTYPE html>
<html>

<head>
  <meta charset="UTF-8" />
  <meta name="viewport" content="width=device-width,user-scalable=no,initial-scale=1,maximum-scale=1,minimum-scale=1">
  <script src="https://cdnjs.cloudflare.com/ajax/libs/babel-standalone/6.26.0/babel.min.js"></script>
  <link rel="stylesheet" href="https://cdnjs.cloudflare.com/ajax/libs/antd-mobile/2.2.8/antd-mobile.min.css">
</head>

<body>
  <div id="root"></div>
  <script src="https://cdnjs.cloudflare.com/ajax/libs/lodash.js/4.17.11/lodash.min.js"></script>
  <script crossorigin src="https://cdnjs.cloudflare.com/ajax/libs/react/16.7.0/umd/react.production.min.js"></script>
  <script crossorigin src="https://cdnjs.cloudflare.com/ajax/libs/react-dom/16.7.0/umd/react-dom.production.min.js"></script>
  <script src="https://cdnjs.cloudflare.com/ajax/libs/antd-mobile/2.2.8/antd-mobile.min.js"></script>
  <script src="https://cdnjs.cloudflare.com/ajax/libs/fetch/3.0.0/fetch.min.js"></script>
  <script src="https://cdnjs.cloudflare.com/ajax/libs/fetch/3.0.0/fetch.min.js.map"></script>
  <script type="text/jsx">
    console.log(window['antd-mobile']);
    const LocaleProvider = window['antd-mobile'].LocaleProvider;
    const enUS = window['antd-mobile'].LocaleProvider.en_US;
    const Button = window['antd-mobile'].Button;
    const SearchBar = window['antd-mobile'].SearchBar;
    const Picker = window['antd-mobile'].Picker;
    const List = window['antd-mobile'].List;
    const Grid = window['antd-mobile'].Grid;
    const NoticeBar = window['antd-mobile'].NoticeBar;
    const CheckboxItem = window['antd-mobile'].Checkbox.CheckboxItem;
    const BASE_URL = window.location.hostname;

    class App extends React.PureComponent {
      blinkStart = () => {
        fetch(`http://${BASE_URL}/startBlink`).then(res => res.json()).then(json => console.log('Blinking Started!')).catch(err => console.log('Error while attempting start blinking'))
      };
      blinkStop = () => {
        fetch(`http://${BASE_URL}/stopBlink`).then(res => res.json()).then(json => console.log('Blinking Stopped!')).catch(err => console.log('Error while attempting stop blinking'))
      };
      render() {
        return <LocaleProvider locale={enUS}>
          <div>
            <SearchBar placeholder="search here..." />
            <Button onClick={() => this.blinkStart()}>Start Blinking</Button>
            <Button onClick={() => this.blinkStop()}>Stop Blinking</Button>
          </div>
        </LocaleProvider>;
      };
    };
    ReactDOM.render(<App />, document.getElementById('root'));
  </script>
</body>

</html>
)=====";
NeoPixel Featherwing Code
AdaFruit has a library for controlling the NeoPixel LED array and here is the alternateColors function that toggles the LEDs between columns of green and red.
First include the necessary libraries and initialize the neopixel strip. (The neopixel featherwing is an 8 x 4 grid of 32 neopixels that are connected together in a single line)
#include <Adafruit_NeoPixel.h>

#ifdef __AVR__
#include <avr/power.h>
#endif

#define NUM_LEDS 32
#define PIN 15
#define BRIGHTNESS 20

Adafruit_NeoPixel strip =
    Adafruit_NeoPixel(NUM_LEDS, PIN, NEO_GRB + NEO_KHZ800);
Utilize the initialized strip to perform functions on the LEDs. Using for loops you can control all 32 neopixels individually. Here are a few functions I'm using:
// Fill the dots one after the other with a color
void colorWipe(uint32_t c, uint8_t wait) {
  for (uint16_t i = 0; i < strip.numPixels(); i++) {
    strip.setPixelColor(i, c);
    strip.show();
    delay(wait);
  }
}

// alternate between two colors on even and odd LEDs
void alternateColor(uint32_t c1, uint32_t c2, uint8_t wait) {
  for (uint16_t i = 0; i < strip.numPixels(); i++) {
    if (i % 2 == 0) {  // set even LED to color 1
      strip.setPixelColor(i, c1);
    } else {  // set odd LED to color 2
      strip.setPixelColor(i, c2);
    }
  }

  strip.show();  // apply the colors
  delay(wait);

  for (uint16_t i = 0; i < strip.numPixels(); i++) {
    if (i % 2 == 0) {  // set even LED to color 2
      strip.setPixelColor(i, c2);
    } else {  // set odd LED to color 1
      strip.setPixelColor(i, c1);
    }
  }

  strip.show();  // apply the colors
  delay(wait);
}

void clearStrip() {
  for (int i = 0; i < NUM_LEDS; i++) {
    strip.setPixelColor(i, strip.Color(0, 0, 0));  // change RGB color value
                                                   // here
  }
  strip.show();
}
Connecting the Dots
After uploading the code to the ESP8266 it should automatically join your wireless network and pull an IP address. Find the IP and browse to it in your browser pull up the ReactJS page. In the React UI code I have 2 buttons, one for startBlink and another for stopBlink and when clicked fetch is used to call a URL at the local IP for the corresponding function path. For example to execute the stopBlink function the UI calls the following URL http://[ESP8266_IP_ADDRESS]/stopBlink. In the stopBlink function we construct a new JSON object to respond to the request to stop blinking with the status and a message.
React Function
blinkStop = () => {
    fetch(`http://${BASE_URL}/stopBlink`)
        .then(res => res.json())
        .then(json => console.log('Blinking Stopped!'))
        .catch(err => console.log('Error while attempting stop blinking'))
};
In the initial setup function of our arduino code, add the logic to handle clients browsing to specific paths and the function to execute when they do.
  server.on("/startBlink", startBlink);
  server.on("/stopBlink", stopBlink);
  server.onNotFound(handleNotFound);
Here is an example of the stopBlink function and how it responds with a JSON message using the arduinoJson library.
void stopBlink() {
  clearStrip();

  // Create the response object
  StaticJsonBuffer<500> jsonBuffer;
  JsonObject &response = jsonBuffer.createObject();
  response["status"] = 200;
  response["message"] = "Successfully stopped blinking";
  String json;
  response.prettyPrintTo(json);
  server.send(200, "application/json", json);
}